Tuesday, March 30, 2010

Tools of the Trade Tuesday: Its a jungle out there...

A few years ago I ran across the cutest animal cookware in an Anthropologie catalog. It was right about the time I was moving into a new apartment, so I decided to make my new kitchen animal themed. My sister bought me several Boston Warehouse utensils to help get me started, but my favorite finds were giraffe measuring spoons and the gaggle of geese measuring cups.


I have to admit that I have never actually used these kitchen tools, but they look super cute on my counter and I always get compliments on them. They are definitely more decorative tools instead of useful tools. But every girl needs some of these anyway!


Anthropologie actually has quite a bit of kitchenware. Their items are kitchen and vintage, and definitely fit in my kitchen. They also make cute aprons, too...in case you are looking!

Happy cooking! (And decorating!)

Thursday, March 25, 2010

Mmmmmm.....muffuletta!!!

This weekend my family and I are making a trip down south to "the big easy." For those not familiar with that term (or this part of the country), I'm referring to non-other than the ultimate party city, New Orleans. Let me put to rest your wild imagination though. We aren't going to New Orleans to party. I mean, come on! I'm going with my mom! However, there will be much reveling (not revealing), and much devouring (not debauchery) taking place!

This trip is kind of a big deal to me! I haven't been to New Orleans in nearly 10 years....which is so weird for me to say. Growing up we visited the city quite a bit. My dad lived in New Orleans in his young adulthood, and has always loved the city. In fact, one of my favorite memories was a spontaneous trip that we took when I was around 10-12. My parents just up and decided to take us to Nola for the weekend, and when we arrived late that Friday night, my dad took us on an adventure walking the city instead of making us go to sleep. It was fantastic!

However, New Orleans was never really an important or appealing city to me as a child. Yes, I enjoyed visiting. They have a great aquarium and zoo! But it was never one of those places that I truly loved to visit. Probably because the city is kinda dirty. Like Paris. (Paris doesn't really appeal to me either. At least, it didn't when I visited.) And most people go to New Orleans to make fools of themselves and lost all of their inhibitions. I like my inhibitions just as they are.

Needless to say, New Orleans is very unique. The city is rich with history that not only has affected the South of today, but also our entire country. And besides a culture of gypsy lined streets, voodoo, magic and superstition, New Orleans is also a city full of culinary wonderfulness! If you have never had a coffee and beignets at Cafe Du Mond, a shrimp poboy from Cafe Masperos or a muffuletta from Central Grocery, then you probably have never really lived. Seriously. New Orleans has fantastic food! Food I fully intend to explore and sample during my three mini-break.

In honor of my trip down south, I would wanted to post a recipe for muffulettas. I haven't always been a fan of this massive sandwich, probably because I'm not such a huge fan of salami and other such meats. But the one time I have made this sandwich, it was completely to die for!

I have to admit that my recipe is part what I have found online and part what I can remember from making this nearly 2 years ago. I was "taught" by...well...let's just say some random person's mom. And I didn't write it down. And I can't remember it exactly step-by-step. But, from reading several different recipes online, here's what I can put together.

**Special Note: Many of these ingredients aren't always found at a regular grocery. You may need to find a specialty store (like Central Market in Texas or Fresh Market in central MS). You can also find these at a local butcher or meat market.

Ingredients:
10-15-inch loaf of Italian bread (which I can totally new bake on my own with my new cookbook)
1 jar of Olive Salad (if you can't find it, make it)
4 oz. sliced mozzarella cheese
4 oz. sliced provolone cheese
4 oz. thinly sliced cappocolo or prosciuto
4 oz. thinly sliced Genoa salami
4 oz. thinly sliced mortadella (I prefer with olives.)
4 oz. thinly sliced pepperoni or a peppered salami
Extra Virgin Olive Oil

Directions:
Preheat the oven to 375 degrees.

Slice loaf of bread in half, horizontally. Spread thin layer of olive oil on each side of the bread, then spread a generous layer or olive salad on each half.

Layer the mozzarella over the olive salad on the bottom half of the loaf, and then layer with meats (in no particular order). Next, cover the top half of the bread with the provolone, and place on top of the bottom half to make a sandwich.

Wrap the sandwich in foil and bake at 375 degrees until the sandwich is hot and the cheese has melted. It should take about 15-20 minutes.

Unwrap sandwich and slice in wedges, like a pie. This recipe will make 4 extremely large servings or 6-8 smaller sandwiches. Serve with chips and Abita beer. : )

________________________________________

If you can't make it down to New Orleans, have a taste of it in your own home! But I recommend going at least once in your life!

Happy Cooking!

Tuesday, March 23, 2010

Tools of the Trade Tuesday: Good knives make good quesadillas

I will cut you!

Not really though. It was a joke.

Not so long ago, I came home from work one day to discover a package on my doorstep. I didn't order anything. I had no idea what it was. It was from cooking.com. Ooooohhh....something my mom must have ordered for me. Yippee! I love presents, especially when they are unexpected and super especially if they are for my kitchen. I ripped open the box and low and behold, it was a new set of knives.

Was this a joke? Or a hint?

Back story...I used to live with someone who once forbid me to cut things. Not for some domineering "you can't cut things" reason, but for my own safety. I haven't always been so good with the knives. Its a process and I'm still learning. But at one point in my culinary adolescence I was really, really bad with knives.

Not so much anymore. I'm actually getting faster with my chopping and cutting, especially when I use my new super awesome knives my mom gave me. The set she sent was a trio of Rachael Ray Furi knives. I had always wanted some of these knives, but don't think I ever told mom that. And I don't think my mom actually knew how crappy my knives were. I think she just ran across the item and thought I could use them.

Oh, could I!

These are incredibly awesome knives. Seriously. Incredible! The shape of the handle, rubber grip, and blade all work so well together. In fact, they have increased my cutting ability by 40% probably! Okay, so I'm just making that up, but they really do help me cut, chop, slice and dice better. I can even manage onions with these knives since I am able to cut them faster than with an ordinary, dull blade!

Maybe that's saying something about my knife collection though. I think they all need to be sharpened, with the exception of my new Rachael Ray knives. I don't know how to do that though.

I never thought investing in high-end cutlery was a big deal until I actually owned a nice set of knives. But if you do a lot of cooking, like myself, having a good quality knife set is important.

These knives are great. I recommend them to you. That's why they are on my blog. I will also share a recipe that I made last night with the help of these great knives.

Shrimp Quesadillas

Ingredients:
1 bell pepper, thinly sliced (with awesome Rachael Ray knives)
1/2 medium onion, sliced
1 cup (or so) of medium peeled shrimp (I buy frozen from the grocery. You just thaw and pull off the tails.)
1 tbsp butter or margarine
Extra virgin olive oil
1 tsp. each of Ground cumin & Chili powder(Or fajita or taco seasoning)
shredded Monterey Jack
flour tortilla shells (burrito size)

Directions: Thinly slice the bell pepper and onion in strips. Add to skillet and heat on medium high with olive oil. Cook until tender (about 4-5 minutes). Add shrimp and butter to skillet. Season with desired amount of cumin and chili powder (or taco/fajita seasoning if that's what you have). Cook for an additional 4-5 minutes, but be careful to not overcook/burn the vegetables.

Lay tortilla on plate and cover with desired amount of cheese. (I use a lot!) Add shrimp and vegetable mixture on top. Fold tortilla in half, and return to skillet. Cook on medium high for about 3 minutes. Flip tortilla to other side and cook for an additional 3 minutes or so. (Just until the cheese is melted.)

Top with guacamole, sour cream, pica de gallo, salsa, etc. Serve with rice and beans or chips and salsa. Makes about 2 servings.

Thank you Rachael Ray, and whoever really designed those knives, for helping me be a better cook!

Happy cooking!

Monday, March 22, 2010

Turkey-Tomato Panini

I forget sometimes when I'm blogging that everything I put on here doesn't necessarily have to have a wow factor. I'm not saying all of my recipes do have that (or any of them for that matter), but sometimes I don't think to post simple and "uneventful" recipes.

Lunch is a very important part of our day. For me, it serves as a one hour of escape from the craziness of the office where I can take a breath and regain energy for the afternoon. Since purchasing my home, I decided that lunch at home is one way I can really save on my food expenditures. So most days I come home for lunch, fix a sandwich and chill out. I have the luxury of doing this since I live so close to my office.

Not only does it save on money though, lunch at home can help save on the waistline. By carefully choosing the types of food you eat, you can actually be living FAR more healthy than if you went out to eat every day. In fact, most of my at-home lunches are right around 350-400 calories. You can't find that at Subway!

A typical lunch for me involves three things - turkey, provolone and Roma tomatoes. This is one of my favorite sandwich combinations. Another important feature of lunchtime at my home is my panini machine. My brother bought this for me a few years ago for Christmas, and little did I know at the time how integral of a role it would play in my kitchen. However, I literally use this thing almost every day! (Thanks, Joey!)

Here's my turkey-tomato panini...or...aka everyday lunch!


Ingredients:

4-6 slices of turkey (or other meat of choice - If you look here, I used leftovers from a turkey breast I baked the day before)
1 slice provolone cheese
3-4 thin Roma tomato slices
mayo, mustard, etc.
OR...Spicy Mayo: 1 tablespoon light mayo mixed with 1-1.5 teaspoons hot sauce
2 slices of bread


Directions: Slap all the ingredients on the bread....place on the panini grill, and cook for 3-4 minutes. Flip sandwich and cook for another 3-4 minutes.


Side suggestions: I love chips, so I usually eat those. But I also like to enjoy a fruit cup or yogurt from time to time.

Friday, March 19, 2010

I'm dreaming tonight....

A few days ago I posted about my 30th birthday coming up. Is it too early to make public my wish list? Honestly, the desire for my wish list stems from a book I am reading right now. (Which accidentally was recommended through a series of emails where I was questioning a male friend's addiction to The Bachelor.)

Anyway, while reading this book, my sometimes passion of photography started creeping up again. Here's the dilemma. The lovely camera my parents bought me several, several years ago broke in one of my moves. Darn! So all I have is a tiny little cybershot, which does not take artistic pictures. And I've borrowed my dad's super awesome, high-tech digital SLR before, but its way too complicated for me.

I'm going on these trips in the next few months:

Next week = New Orleans
May = Fort Worth
July = Canada & New England

I must have a camera! Okay, so I probably won't have a camera by next week. But at least I can borrow one of my dad's. (He just doesn't know it yet.) And I can still probably borrow it for my photo series I want to do in Fort Worth. But come July...come my big road trip up north...I want a nice, but not too complicated, digital SLR.

Just think of all the things I could do with it! I could take framable pics of Will and Maggie! I already have a Christmas idea that I could do for my dad. I could improve the photos I post on my two blogs! The possibilities are endless!

So, in my whining and pleading in this post...I'm hoping that it will somehow make its way through the World Wide Web to birthday present givers every where. Or maybe two specific birthday givers that might actually read this. (I totally use my blog to suggest to folks what I want without just emailing them a link to the actual item...which I have been known to do in the past. Talk about a brat!)

Seriously though, I am going to start saving up for a camera. Though I know I won't be able to save enough by the time I take my trip this summer. So, if all else fails, maybe I can keep borrowing cameras from my dad until I can save enough to buy my own. But in the meantime...here are three cameras that I, in my uninformed, amateur photo option, am dreaming about....

Nikon D3000 SLR with 18-55mm VR Lens

Canon EOS Rebel XS with 18-55mm IS Lens

Olympus E-System E-520 w/ 14-42mm & 40-150mm Lenses


PS - I really don't need an expensive, uber nice SLR. It would be too complicated for me to use. I just need something simple, practical, but with the ability to get cool shots! : )

Mexican Fudge

At my old job, we used to have random morning parties for special events. Sometimes it was for a holiday, sometimes a birthday, sometimes just because. On such events, we always requested Suzanne's delicious egg dish. It was sooooooooooo good, and very easy to make. Most definitely a crowd pleaser. So, if you are looking for something for a weekend brunch, I recommend making Mexican fudge. Its great served with biscuits, croissants, or as a stand alone dish.

Mexican Fudge

Ingredients:
1 dozen eggs
1 lb Monterrey jack cheese with jalapenos
1 lb cheddar cheese

Directions: Mix eggs in a mixing bowl and set aside. Add a bit of milk & salt & pepper. Grate cheese and layer in bottom of 9X12 pan sprayed with Pam. Pour eggs over the cheese. Bake at 350 degrees for about 20-25 minutes. Don’t let it get too brown on top.

Five O'Clock Friday

I'm sorry that I don't have a recipe today for 5 O'clock Friday. Maybe because its 9:00 am, and I'm just not interested in anything right now but coffee. However, I did stumble across a French 75 on a blog I follow this morning. That can be your recipe for today!

On today's episode...addition...post...I would like to talk about tonight's after work plans. You see, tonight is very special. My dear friends, KJ and Jake, are coming to visit on their way between GA and TX. Yes, technically, my home is out of the way. But not THAT far out of the way, and its a place for them to stop for free to break up the drive.

Tonight I plan on taking them to Oby's, a local eatery that is very famous in my hometown. I remember always eating here when I was a kid and we came up for football games. Oby's was the cause of probably half of the freshman 15 for me and my friends. Its one of those places in town that really epitomizes local cuisine.

After dinner, who knows. Maybe my friends will want to sample the local "night life." Or maybe not. Maybe we will just go home, sit in the backyard around the fire pit (yes, I have one...finally), drink wine/beer, and enjoy each other's company. I'll leave that up to them. All I know is that come 5:00 this Friday, I will be spending it with great friends. There's no better "recipe" for a good time than that!

How cheesy am I????

Tuesday, March 16, 2010

Tools of the Trade Tuesday: Aprons

On today's favorite tools post, I decided to talk a bit about my three favorite aprons. I'm a girly girl, and have always loved wearing an apron in the kitchen. Its very practical, you know! Especially if you want to keep from messing up your outfit with spills or stains. (Maybe I'm messy sometimes.)

The first apron was a bit of a joke, and was purchased in Fredericksburg, TX on a mini-vacay.


Its a totally true statement. I swear. And I'm a pretty good cook...so you can only imagine...

This apron is adorned with a black and white polka dot ribbon and pink tulle, which is why I wanted to buy it. I had seen "I Kiss Better than I Cook" aprons before, but never one this cute. One day it might turn out to be lucky. Not so far....

The next apron is one that my sister and her family gave me for Christmas. Its actually my favorite apron. Not only is it adorable, but its made of thick material and has a convenient little pocket for sticking recipes, utensils, a drying towel, etc.


The bird apron was purchased from Etsy, from the Pamwares page. Etsy is a place to buy and sell things homemade. It is totally awesome. Pamwares sells ridiculously cute aprons. This was probably the best gift my sister has ever bought me. I love it and wear it all the time! Her aprons are really well, made, sturdy, and I would recommend them to anyone who doesn't already have an apron.

On a side note, I have started following the Pamwares blog. I really, really love her stuff! And, she has a cute bulldog, so she gets double brownie points! Plus, I really like her logo/blog header. I've been trying to come up with a new design for mine, and have temporarily settled on the one to the left. But her's is pretty darn cool!

The third apron I would like to show you is one I purchased over the weekend at The Cupboard in my hometown. It is very girly, very cute, and has an "S" on it, unlike the image here.


I would consider this to be a "first date" apron. As in...if I were cooking for a special someone for the very first time. Its fun, flirty, and I think it captures my personality with all the polka dots and ruffles. (Don't worry blogees...you have not missed out on any news in my life. This is not being used for any "first dates" any time soon.)

Right now my aprons hang on the end of my baker's rack. However, I would love to find a place to hang them so each of them are displayed in full view, instead of being stacked on top of each other. I'm just not sure where or how I want to display them yet. I'm totally open to ideas! For now they are casually draped in my dining area.

I think every cook should have an apron...even if you are a man. I can't tell you how many shirts I have ruined splashing grease or oily foods on my clothes. Aprons are not only stylish and fun, they are also very practical for non-perfect cooks.

So, that's it my friends! These are my tools for this week! Happy cooking!

Sunday, March 14, 2010

More craft time: EAT

UPDATE: In my search for home office decor today, I ran across a super cute EAT sign from Pottery Barn, AND its on sale! Check it out!!!

____________________________________________

Have you ever seen the show Cougar Town starring Courtney Cox? Its pretty decent. I mean...weird at times, but still okay.

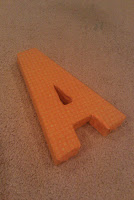
Anyway, in Courtney's kitchen, she has the letters E-A-T on the wall. The letters are from Anthropoligie, and I actually saw these a year or so ago and almost bought them to spell out my niece's name in her room.

I thought it was a great idea for the kitchen, but the letters cost $14.00 a piece. Hmmm...I figured I could figure out a way to do them cheaper. So, here's what I came up with.

I went to Hobby Lobby and purchased the necessary letters for about $3.50. (They were on sale half off.)


Next, I went to the fabric store and bought scrap pieces for $5.00.


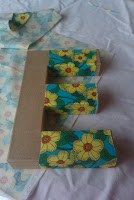
I covered the letters with the cloth and secured them with hot glue. I have to say, I had to get a little creative with the different angles and cut outs. If you look up close, there are definite imperfections. But, they are hanging high on a wall so no one can really tell.

Here you can see how I covered the "legs" of the E. I did the same with the T. I then when back over this and covered with a solid piece of fabric.


I even had a little help. Or....Juliet came and sat down on top of my fabric right in the middle of the craft table.


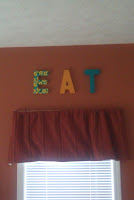
Here is the end product. I have Fiestaware dishes, and the letters coordinate with my dishes. They also coordinate with a Mexican dish I have hanging on another wall.


The project ended up costing me less than $10.00. That's pretty good compared to the $14.00 letters I could have bougth pre-covered. Sure the Anthropologie letters are probably cuter, but I think mine look pretty good too!


Organizing my home office/guest room

I have to blog while the SEC Men's Basketball Championship game is on. My stomach is in knots, and blogging, and Internet browsing is keeping me sane right now. Big game on the line for my dawgs!

Okay, so yesterday I bought a new desk. I have been wanting a new desk for my home office/guest room since I moved in, but haven't found the right one for the right price until yesterday. So, I purchased one from Wal-Mart, believe it or not. Their Better Homes & Gardens collection actually has a lot of cute stuff.

Here's the problem. I know this bedroom is crowded. But, I need a queen bed in there for my family (who has season tickets to football games and comes to visit quite often), and I need workspace. So, I just have to make the best of the tight space.

Here's what i have right now:


I really want to keep the desk cleaned off as much as possible. I would love to have workspace for when I need to spread stuff out. I also tend to be a "stacker" when it comes to my desk. (At work, my desk is always a mess.) Installing some kind of organization system where I can temporarily "stack" mail and other papers would be awesome!

Here are a few items I have found:


I had to idea to find some cheap pails like this to hang from hooks underneath a cabinet. That way I could still have my pens, pencils, scissors, etc. handy, but they are off of the desk.

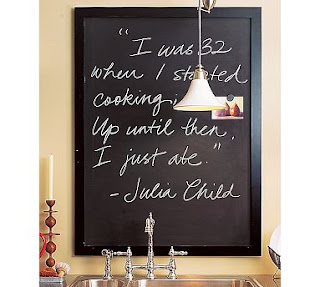
I thought this chalkboard was cute. I've always like the ideas of putting old fashioned chalkboards in offices. I have one that I could paint black and hang on the wall. I could keep lists here. I also like lists.


I like these vintage keys. Not sure why, but they just appeal to me. I don't know that I would actually put these in this room, but they kind of are serving as inspiration right now.

Also in this room, I already have a few photographs I took on a trip to England. I plan on keeping these in the room, as well as the flower above the bed. (It was a super awesome find that I bought at a local shop this summer. Got it on major, major big discount!) However, the mirror I have never really liked, and it can totally go.

SO....here's the deal. I need help with some suggestions for this room. What would you do? I want to keep the office materials in neutral colors, so I'm going to stick to black and white. The other colors are going to remain red and gold. (I'm doing this on a budget, and not changing all of these colors.)

What are your thoughts? How can I make this small space work?

Friday, March 12, 2010

Thoughts on Turning 30...


In approximately 105 days I’m turning 30.

I should just give up and end the post there. BUT, in the next 105 days, I’m going to convince myself (and you through my blog) that turning 30 really isn’t so bad after all. Turning 30 can have its advantages, and its disadvantages. I am going to choose to focus on the advantages though.

A few weeks ago I was visiting with my grandfather during my nephew’s birthday lunch. We were watching 17 Again (starring super hottie Zac Efron), and I was trying to explain the premise to my grandparents since they missed the beginning. Once explained, my paps said “Why would you want to be 17 again? I’d rather go back to being 30, like you.” He went on to explain that 17 is very young, but at 30 you still have your entire life ahead of you.

That was very comforting. Seriously, it was!

I’m turning 30 in 105 days, which means, after those 105 days expire, I have my ENTIRE life ahead of me! I’m settled in a good, grown-up job. I own my own home and car. I don’t have any debt except for my mortgage. I think turning 30 is going to be okay, financially speaking.

I’m turning 30 in 105 days and I’m not married. Or dating. Or even interested in anyone. Hmmm….Living in the South, that presents a problem. Though, I’m finding that the trend of marrying later in life is starting to drift this way. So, I’m not a social pariah being single at my age. (THANK GOD!)

In light of me turning 30 in 105 days, I wanted to come up with a list of 30 things to do before the end of 2010. I came up with about 4 things. Not too exciting. So now my goal is to think of 30 “off the wall” or uncharacteristic things on the big road trip Julie and I are planning this summer. We are heading north to Toronto (which counts for one thing since I’ve never been to Canada) then out east through New York to Maine and hitting every New England state, plus some others, until we get home. There’s lots of planning (and saving) to be done in the four months leading up to the trip, but this is my 30th birthday present to myself.

I guess turning 30 really isn’t going to be so bad. I mean, I can think of lots of disadvantages off the top of my head, and it seems so old to me…but really…it’s not bad at all. I’d rather be 30 than 17 anyway. Or even a young 20-something. At that age most folks think they have things all figured out, but really…they don’t at all!

I’m turning 30 in 105 days. Write it down. It’s June 25, in case you can’t count! Here’s to turning 30! Yipee!

Five O'Clock Friday - Mango Peach Sangria

So, spring has sprung...or at least, I have green stuff growing in my backyard instead of all the brown, dead grass. I wish I could say the green things were all pretty plants and/or grass, but it looks like weeds. At least they are green though!

With the arrival of spring comes the tradition of lounging outside with friends and family on a warm beautiful day...when we have warm beautiful days! With lounging comes cookouts, and with cookouts comes the excuse to have a cool, spring/summer cocktail.

In light of the pending arrival of spring (which is technically a week from tomorrow), here's a light, fruity cocktail that will please even the most picky critics! I served this up one year for a 4th of July picnic, and I think we went through 3 pitchers. Even the boys loved it!

Mango Peach Sangria
From Semi-Homemade by Sandra Lee on The Food Network

Ingredients:
1 cup frozen mango chunks & 1 cup frozen peach slices
-OR- (what I use) 2 cups frozen mixed fruit (comes in a bag with strawberries, peaches, melon, mango, etc.)
1 cup peach schnapps
2 (11.5-ounce) cans mango nectar
1 bottle white wine (cheap is okay!)

Directions: Combine all ingredients in a large pitcher and stir. Refrigerate for several hours for flavors to blend, or serve immediately. Serve chilled in wine glasses.

Thursday, March 11, 2010

Luck-O-the-Irish

In about six days we get to celebrate that glorious holiday, once a year, where everyone has the excuse to drink massive amounts of beer. Being the good Christian, Southern girl that I am...of course I don't drink beer. Or smoke. Or kiss boys. Okay, one out of three ain't bad....

Moving on....

In about six days we get to celebrate that glorious holiday of St. Patrick's Day! Now that I think about it...it not only gives you reason to drink massive amounts of beer, but also reasons to kiss or be kissed IF you are Irish. (You know...kiss me, I'm Irish.) Someone way down the line in my family was Irish. Which means in my mutt American blood, I'm part Irish...so...line up boys!

I'm totally getting distracted by the beer and the kissing....

In about six days we get to celebrate that glorious holiday of St. Patrick's Day! What better way to celebrate than to cook a dish with Irish beer! I hear the cheers in the crowd already!

I came across this link via Twitter for Guinness cupcakes. These sound and look delish!

But I also wanted to pass along a link to one of my previous posts for Chocolate Guinness brownies. They are super rich, and super delicious! I recommend making the raspberry sauce and serving with a scoop of vanilla bean ice cream.

What are you favorite St. Patty's Day treats or Irish???

Happy cooking!

Wednesday, March 10, 2010

An Open Letter to my Idiot Neighbor


Dear Idiot Neighbor,

Today you have almost topped you stupidest parking position ever…or in the year I have lived down the street from you. I remember one other time where you actually parked worse than you did last night, believe it or not. But today, amidst the wind and rain, you have realized your second all-time worst parking job ever.

Though, neighbor, I applaud your lack of rules and consideration for everyone who lives around you. I, for one, am a rule follower. I like to park my car in the garage, as to not block the street or obstruct the view of our street. And I do have to admit that other neighbors park along the street, and I can understand the need for more parking, however…you have no other cars and/or other inanimate objects in your driveway. One would think one could at least pull all the way in.

I have come to two possible conclusions about your lack of parking abilities. First, you are suffering from some uncontrollable substance addiction that impairs your ability to operate a moving vehicle properly. If that is the case, please stay off the road and seek help. I, or anyone else in our small town, would hate to meet you on a street one night and risk peril to either of us or our vehicles.

The second is that you are plainly an idiot. I’m sorry if my words seem harsh or unsympathetic, but I cannot otherwise figure out why you would choose to park so poorly nearly every night. Maybe you can’t drive. Maybe your grandfather or father never taught you how. If that’s the case, I am terribly sorry, but take driving lessons. I’m sure there are still some driver’s ed teachers at one of the high schools in the area. It shouldn’t be that hard to find someone to show you the rules of the road.

In the meantime, I will offer disapproving glances and curse words under my breath as I drive by your house. There may even be some fist shaking from time to time. But one thing is for sure, I will continue to loathe your parking methods until one day, one sweet day, you actually learn how to drive.

xoxo

Tuesday, March 9, 2010

Tools of the Trade Tuesday: Wooden Pastry Board & Bread Cookbook

Tuesday is going to quickly become my favorite blogging day. Why??? Because I love kitchen gadgets!!! I have lots of useless ones, such as an apple corer...I mean, who needs that? Though, I also have a corer and divider, and I LOVE THIS! Then there's the herb roller/cutter...It really doesn't work very well. But still, I have them because, like I said, I love kitchen gadgets.


Well, after reading about a new cookbook that my friend Jenn has, I decided I had to have it. So, I got on Amazon.com and bought it. And since I was going to turn myself into a homemade bread maker, I also decided I needed to be grown up and have a wooden pastry board like my mom. So....today's kitchen gadgets are....

My new Catskill Craftsmen Wood Pastry Board with Baking Graphics

And...the cookbook Artisan Bread in Five Minutes a Day: The Discovery That Revolutionizes Home Baking

Why I wanted a wooden pasty board...

At heart, I am a pie maker. One of the first things I ever remember making, and mastering, was a Dutch apple pie. My mom taught me how to make this when I was young, and I recall us winning an apple pie baking contest at a church picnic one summer. Plus, part of the art of an apple pie is the end product and how pretty the top turns out. I still take pictures of all of my masterpieces. The tops of your pies can be custom designed, and in the past I have done an apple cut out, fall leaves, and even an MSU themed pie with paw prints! Really all you need is a rolling pin, some cookie cutters or a small knife, and a little imagination. I also love the movie Waitress, which always inspires me to bake pies.

Any pie baker knows that to make your homemade crust, or cookies, or pizza dough or anything else that requires rolling, that you need a nice, clean surface to roll. For the last several years I have used a plastic cookie sheet that rolls up. Those things drive me nuts though! You always have to find heavy objects to weigh down the corners, which gets in the way of the rolling process. Then, over Christmas, when Will and I were baking cookies, my mom let me use her wooden pastry board. It has pie shapes and measurements already on there! *gasp* I knew I needed one of these! However, time passed by until I decided to become a bread maker and needed a pastry board of my own.

So what did I do? I got on Amazon.com. Well, first I called my mom and asked her what she calls that wooden thing uses to roll out dough...then I got on Amazon.com and searched for a wooden pastry board. I found one for only $25, and since I'm a Prime member, I get free shipping. HOORAY!!! I got it in the mail last week, and it is fantastic! It's large, and not terribly heavy, and just perfect for my pie and bread making adventures. I totally recommend this board for not only its usability, but also the great price!

Now to the cookbook....

I'm so astounded by this book, which I knew I would be when I first read about it. I ordered it with the pastry board on Amazon and read it over the weekend. (Yes, I sat down and read a cookbook. I do this often, actually. You learn a lot that way.)

Anyway, it really is as easy as it sounds! I made a half batch of the master recipe yesterday and baked a half pound loaf for dinner for my brother. And he said he loved it! He was really impressed! The bread was golden and crunchy on the outside and soft and moist on the inside. It made the perfect loaf of bread, and it was pretty on top of that! (SEE MY PIC!!!)

Tonight I'm taking the recipe and making a sweet and spicy bbq chicken pizza for dinner. (You guys know I don't buy pizzas, right? I always make my own. I should start a pizza label on here. I love making them for quick and easy dinners. Though, I have only make a homemade crust once, and I typically use the Mama Mary's pre-made crust.) However, now that I have learned a fast and easy way to produce pizza dough, I will probably never buy a store-bought crust again!

____________________________________________

Oh...kitchen gadgets, how I love thee! And if I keep buying more and more, I'm going to need a bigger kitchen and a bigger house! Not to mention a bigger bank account to fund all of the other bigness! Hmmmm...maybe "Tools of the Trade Tuesday" should stick to gadgets I already have now! : ) I already have a running list of what I want to blog about anyway.

So...what are YOUR favorite kitchen gadgets? Share the love! And, as always....

Happy cooking!

Monday, March 8, 2010

Just another manic Monday...

It's just another manic Monday
I wish it was Sunday
'Cause that's my funday
My I don't have to runday
It's just another manic Monday


Around 10:00 this morning I called my brother to see where he was. Running late, which isn't atypical for any normal individual on a Monday morning. But, due to his tardiness, he couldn't stop by my house on his way through town. That meant he was planning to come over later in the evening to remedy my toilet flushing issues. (Don't worry, they are manufacture issues, not installation. Which is good being that the installer works for my father and brother. I can't complain about faulty plumbing parts, though, since I am getting them for free.)

N-E-WAY...(to revert back to my 7th grade note passing references)...

Being the wonderful, caring sister and true Southern Belle that I am, what do I do? I offer dinner to Joe the Plumber in exchange for his services. I mean, I think I'm the one getting off with the better end of the deal. Free plumbing work for an easy to prepare and mostly cheap meal that I get to enjoy as well! (I'm not telling my brother that his work is just an excuse for me to fix one of my ALL TIME FAVORITE Southern meals. He doesn't need to know the selfishness behind my dinner offering! He'll never know. He doesn't read my blog. Wife of the brother...don't tell him if you read this!)

But back to the Manic Monday...Can you tell I am totally off focus today?...Since I found out mid-morning that my brother was coming over for dinner instead of while I was at work, I needed a fast and easy meal that I could fix on my lunch break. So, pot roast came to mind. (Maybe because I think subconsciously it was suggested by another co-worker in passing.)

Lunch time came round and I made a mad dash to the market. In less than 10 minutes I grabbed a decent roast, carrots and potatoes. I had everything else I needed already at home. Then I whipped home (since I basically live across the street from the grocery) and began throwing the dinner in the crock pot. I had it done in about 15 minutes, literally. AND...I had time to make my turkey and tomato panini for lunch, sit down and eat my lunch, and whip up a batch of dough for homemade bread that will hopefully be ready to bake for dinner tonight. I did that in about an hour and 5 minutes. Seriously. And in high heels and a dress, since it was the middle of my work day.

I really can't brag about my quick dinner preparation though. I mean, crock pot roast is one of the easiest meals to make EVER! And there's really not a set recipe or science to perfecting it. It really is just throwing a bunch of stuff in a pot and letting it cook all day. But here's what I typically do:

Ingredients:
1 roast (Size - Depends on your amount of guests. Type - rump roast, eye of round roast, chuck roast, etc. Whatever you prefer. I don't have a fave, but I chose an eye of round today)
1/2 to 1 onion sliced in rings and then halved
1 small bag of mini peeled carrots (That you can just dump in. So easy!)
Potatoes (Amount - Depends on guests. Type - Today I took baby gold potatoes that I could wash and dump in. I needed something fast. Normally I quarter new potatoes or chunk russets.)
Some type of liquid** (see seasonings)

Seasonings:
This is where you can be creative.
Tony Chachere's - Since my brother likes to sweat when he eats, I took the Cajun spice route. I rubbed a bunch of Tony's on the roast. This is a very Southern way of cooking. We love Tony's on EVERYTHING though!
Worcestershire - Before rubbing on the dry seasoning, I gave the roast a good douse of Worcestershire sauce. I can't get enough of this stuff on my red meats or homemade chex mix.
** Liquid - Most people use water. Some people use Coke, and I think that's weird. Though, I have never tried it to see if it tastes good or not. I typically take a dry soup package (like french onion or onion mushroom), mix it in a big glass of hot tap water, and pour it over the roast. I like my roast to be nearly covered in liquid to keep it really moist and juicy. Also, be sure the vegetables you are cooking with it are submerged in the liquid because otherwise they don't always cook so well.

Directions: Throw everything in a crock pot and cook on high for about 4-5 hours or low for 8-10 hours. Its's THAT easy! Seriously! Though, if you want step by step instructions, here's what I do...

1. Rinse roast and place in crock pot. Douse with Worcestershire and/or Dale's. Sprinkle with dry seasonings (salt, pepper, Tony's, etc.)
2. Dump in potatoes, carrots and sliced onions and position around roast.
3. Pour in liquid of choice, but avoid pouring directly over the roast. (It will wash away the dry ingredients you already put on it.)
4. Set your crock pot to low if cooking for 8-10 hours. OR...set it to high if you are cooking for 4-6 hours. If you have enough liquid in it, it will not get dry.
5. Cover crock pot with lid, and go on with your life. The dinner will cook itself!

Pot Roast Gravy

One of the keys to having the most impressive pot roast ever is the type of gravy you provide. You can't just buy a packet of that brown gravy mix and expect to wow your guests. You need to make your own. Here's how my dad taught me. Though first, I do have to admit that sometimes even the best cooks end up with lumpy gravy. It's just a part of life, and I think good gravy takes years to perfect. But here's my method, and it never fails to taste fantastic!

Ingredients:
1-2 tablespoons of oil
2-3 tablespoons of all purpose flour
salt and pepper to taste
1 large glass of pot roast juice (just scoop it straight out of the crock pot)

Directions: In a medium sized skillet, heat oil with salt and pepper on medium heat. When oil starts to bubble, slowly add flour and whisk immediately. Continue whisking flour and oil until you have a consistent and thick mixture. Slowly, but consistently, add liquid and continually whisk to avoid clumps. You will need to eyeball how much liquid to add depending on the amount and thickness you desire for your gravy. However, as it continues to heat on the stove, it will thicken up a bit. Cut heat down to low and continue stirring gravy until all ingredients are mixed well.

Be sure to taste it before you serve it to make sure it has enough flavor. You can always add Liquid Smoke or Worcestershire for flavor, as well as salt and pepper. But I recommend doing in small increments to avoid over-flavoring.

If you have any lumps in your gravy, then simply strain it into a gravy boat or bowl before serving. No one will ever know! (That is, of course, unless they saw you straining it!)

The gravy is good poured over the entire plate of meat, potatoes, carrots, and everything! TRUST ME! Gravy makes the dish!

______________________________________________________

Pot roast really is an easy dish to make. It probably was one of the first things I learned how to cook when I was a kid, and a staple for Sunday afternoon lunches. It was so easy for my mom to prepare everything in a crock pot and let it cool while we went to church. I don't make it much for myself, though, since I'm used to cooking just for one. Though, I think after today I need to change my philosophy on that! I can always freeze some of the leftover meat for later! : )

Happy cooking!

Friday, March 5, 2010

Five O'Clock Friday: The BBC

In an attempt to be more organized about my blogging, I would like to start a new series of posts. I only have two days worked out in my head so far, so we'll see how this develops.

It's Friday! YEAH! And what do most people want to do after a long work week? Drink! Okay, I have to say that I am honestly not much of a drinker. You give me one glass of wine, and I'm pretty much done for the night. But on the rare occasion that I enjoy a cocktail, I'd like to share my wicked concoctions with you.

Back story...My brother and his wife enjoy going to the beach. They were engaged in Grand Cayman, honeymooned (despite the brother's broken foot) on a cruise, and have taken several other beach trips during their life together. On one of these such adventures, they were introduced to a new drink with a lot of old favorites. Last weekend they served it to me as a "dessert" after dinner. And I have to say it was quite delish!

So, after we finished a delicious soup dinner that my sister-in-law made, they asked if I wanted a BBC. I was like "what?" I mean, I know what BBC is....I've been to England. I really didn't want to watch BBC though (they only get BBC America), and I really didn't know what they meant by do you want a BBC? Weren't they missing a prepositional phrase?

But what Joey meant by that was "do you want a drink that I call a BBC?" So, what is a BBC?

Its simple - Baileys, Banana, Coloda

Ingreadients:
1 batch of Pina Colodas (including rum - see below for ideas)
2 shots of Baileys Irish Cream
1 whole banana

Directions: Mix pina colodas in blender. Add Baileys and banana and blend until smooth.

How to make a pina coloda:
Easy way, buy a concentrated mix in the frozen juice section at your local grocer. It will tell you how much rum to add. OR....I found this homemade version online:

Ingredients:
3 measures dark rum
3 tablespoons coconut milk
3 tablespoons crushed pineapple

Directions: Place the ingredients in an electric blender. Add two cups of crushed ice and blend at high speed for 30 seconds. Strain into a tall tumbler and serve with a straw.

The bro and sis-in-law have totally sold me on BBC's. They are quite yummy as an after dinner drink! And honestly, the alcohol content is pretty mild, so you won't get sloshed!

Remember...drink responsibly, and DON'T drink and drive!

Sheri, sheri, quite contrary....

How does your garden grow?

Honestly, it just grows. I fiddle with it, and sometimes good things happen. Last year (which was my first year in my house), I just did what needed to be done to stay alive. This year...I have BIG PLANS! In fact, this weekend I am going to continue the big plans. I am going to completely dig up the ugly back flower bed and start over. I've been talking about it for ages, but now that its cool, the ground is damp and loose from lots of winter rains, its a great time to dig, dig, dig.

So, what are my plans?

TA DA!


JUST kidding....

That is way too much work for one person, and there is no way I could maintain that with my busy schedule.

I plan to go simple. I would like a few flowers, some lavendar, and maybe a bush or two. And....depending on the amount of sun I get there (I am starting to observe/measure because I have no idea how much full sun that part of the yard gets during the day...), depending on the amount of sun, maybe more roses. Moving on....

Because this bed runs along the back side of my property, it gets a lot of weeds. I'm guessing due to what's on the other side of the fence. I originally thought I would remove ALL of the dirt, lay down weed control fabric, and replace with new, richer soil...but that seems like a LOT of work for one little girl! So, the plan is to dig up the existing plants and weeds, add a bit more soil, plant and mulch. Then I'll just have to do a better job of maintaining the bed this year. We'll see how that goes....

You know, its kinda funny how I live the most boring life of a single girl EVER! I mean, I spend my weekends cleaning, gardening and doing random projects around the house. One would think that I would be out mingling with other singles, dining out, going to happy hours, shopping till I drop (which I would totally do if I had an endless bank account and no mortgage), etc, etc. HOWEVER, I prefer to bake, do yard work, play tennis, and stay home watching movies and basically tending to my piece of God's earth.

I do realize this may never get me married...because I'm never "out and about" on the town. (Hmmm...) In fact, one of my younger, more "citified" girlfriends told me yesterday that all I need to do is insert husband and baby and I'm set! The days of concerts, clubs, late nights out are most likely completely over. I mean, I've been there, done that, and lived the city life in Fort Worth for several years. Now that I'm in my late 20's, almost 30's, I'm much more of a settled home body.

Yes, my less-than-wild single lifestyle may seem boring to most, but, to me, I think its maturity. You can't spend your life being young and free. With age come responsibility. And with responsibility, comes bills! Ha! I wouldn't trade my current status for a "Sex in the City" type of life anyway. I like being boring and conventional. I like being old and mature.

So...interesting how I move from gardening plans to commentary on my single life in a small town. You never know what's going to show up on here!

Wednesday, March 3, 2010

Designer woes....

I need new headers for both of my blogs. If I weren't frugal and trying to save up for a massive vacation this summer, I might pay someone to design them for me. But, alas, money does not grow on trees...or at least any of the trees in my yard.

You would think, as a marketing and public relations professional who oversees design work every day, that I would do my own. But, my confidence in my design skills has completely dwindled since I began work with one of the most talented graphic designers in the area. (Yes, she really is THAT good. Of course, her education and training is in graphic design, and mine is in PR. Which means I have about 1/8 of the design background she does.)

I know, I know...still...I should utilize the minimal skillz I have and design my own blog logos/headers. Its just so much pressure, and I'm such a perfections when it comes to things like this. I just need to bite the bullet and do it though. Maybe I will this weekend....between the yard work and sitting around watching TV. (I live the most exciting life EVER!) We will see...

I think my biggest problem is finding the perfect font and picking the colors that I want. I'm thinking the other blog needs to change from the bright pink to something more subtle. And then after the fonts, its a matter of me figuring out what to include image wise. I can't just slap some stuff together, after all. Remember...I'm a professional!

Okay, enough whining about my headers and blog design. By the way, can you tell I widened the text portion and overall look of this one? Putting my minimal HTML/Web design skillz to work. I have a broad range of minimal abilities!

Peace out!

Tuesday, March 2, 2010

Quick and easy treats for suprise guests

Last night I was supposed to have some last minute guests stop by to look at my remodel project. So, being the true Southern belle and perfect hostess that I am, I scrambled to find a fast and easy dessert to fix. I put out a call on facebook, and several friends made great suggestions, so I decided to post them all for future reference.

1. Chocolate-Meringue Pie
Ingredients:
1 frozen pie crust (deep dish)
2 boxes instant chocolate pudding
Approximately 3 cups, cold skim milk (or according to pudding pie directions on package)
3 egg whites
6 tablespoons of sugar

Directions: Bake pie crust at 400 degrees for approximately 10-15 minutes, or until golden brown. While baking, mix together pudding according to directions on the box. Place pudding in refrigerator to chill. Once crust is baked, remove from oven and cool. (Putting in the fridge helps.) After crust is cooled, pour in pudding mixture and return to refrigerator.

For the meringue, separate 3 egg whites in a mixing bowl. Whip until stiff, but not dry. Gradually add sugar and continue whipping until it forms stiff peaks. Smooth over pie, and bake in over at 400 degrees for about 7 minutes. Tips of meringue should be golden brown. Be sure to watch it so it doesn't burn though.

** Side note - I sprinkled shredded coconut on top of the meringue before baking to add a little texture. It was great! Also, since you are sticking a cold pudding mixture in the oven for a few minutes, it wouldn't hurt to pre-freeze the pudding pie before putting on the meringue.

2. Cherry Cobbler - From Lisa G., a SWBTS friend
Ingredients:
1 can of cherry pie filling
1 box of yellow cake mix (probably a small box of Jiffy cake mix will do)
1 stick of melted butter

Directions: Put cherry pie filling in a pan, cover it with yellow cake mix, melt one stick of butter and pour all over the top of it, bake for 30 minutes on 350, and voila - tasty cherry cobbler. Some people put walnuts on top, but I prefer it plain.

3. Cheesecake - from Andi R., a fellow GBA alum
Ingredients:
1 8 oz. package of cream cheese (of course I use fat free!)
1 8 oz. package of whipped cream
1/3 cup of sugar
1 pre-made graham cracker crust

Directions: Mix cream cheese, whipped cream, and sugar together and pour in crust! Chill and serve! Fruit toppings optional!

4. Mini Cookie Cakes - from Jennifer J., a SWBTS/FW friend and fellow blogger
Ingredients:
1 package of sugar cookie mix, and all the stuff it needs
1 can of cream cheese frosting
fresh strawberries, sliced

Directions: Bake sugar cookies according to directions on package. Cool and frost with cream cheese frosting. Top with sliced strawberries.

5. Fancy Brownies - from April J., a DCCF friend and fellow blogger
Ingredients:
1 package of brownie mix, and all the stuff it needs (Or...make your own)
1 jar of raspberry jam
Ganache (recipe to follow)

Directions: Bake brownies according to recipe on box. (Or use Gwen's yummy homemade brownie recipe). Top brownies with raspberry jam. Then cover with ganache (see below). Serve and wow your guests.

Chocolate ganache
Ingredients:
9 ounces bittersweet chocolate, chopped
1 cup heavy cream
1 tablespoon dark rum (optional)

Directions: Place the chocolate into a medium bowl. Heat the cream in a small sauce pan over medium heat. Bring just to a boil, watching very carefully because if it boils for a few seconds, it will boil out of the pot. When the cream has come to a boil, pour over the chopped chocolate, and whisk until smooth. Stir in the rum if desired. Allow the ganache to cool slightly before pouring over a cake or other dessert. Start at the center of the dessert and work outward. For a fluffy frosting or chocolate filling, allow it to cool until thick, then whip with a whisk until light and fluffy.

______________________________________________

Sorry, folks, but April's recipe won the "OMG! I HAVE TO HAVE THAT RIGHT NOW" award! It was the picture of the ganache recipe she sent. I'm totally making this for my next set of guests.

Baking and entertaining really is as easy as that! I mean, it doesn't take long to make something delicious and sweet to serve to your guests. And trust me....the return on investment is well worth it!

Last night I made the pie. My guests did not make it. So, I ate a piece by myself. It was good. But now I have an entire pie to eat at my house. At least I made it low fat!!!!

Happy cooking!

Our Teacher of the Year

Yesterday a team of camera crews and media types stormed by brother-in-law's classroom and named him the 2010 teacher of the year for his school district! Dan teaches at me and my sister's high school alma mater. We are very proud of him!